









Adjustable Countersink Drill Bit Set | Professional Woodworking Screw Finishing Tool
- $ 703.00 MXN
$ 1,386.00 MXN- $ 703.00 MXN
- Unit price
- per
Others Also Bought












-
Enjoy free shipping on orders over $50. Orders are processed within 1–3 business days and typically arrive within 7–15 business days.
-
We work with trusted international shipping partners to deliver orders worldwide.
-
Tracking information will be sent by email once your order ships, and you'll receive updates at key stages of transit until your package arrives.
Shop with confidence! We offer a 30-day return and exchange policy from the date you receive your order.
If you're not completely satisfied with your purchase, please contact our customer support team for assistance.
For return or exchange requests, please email us at support@householdchoose.com.
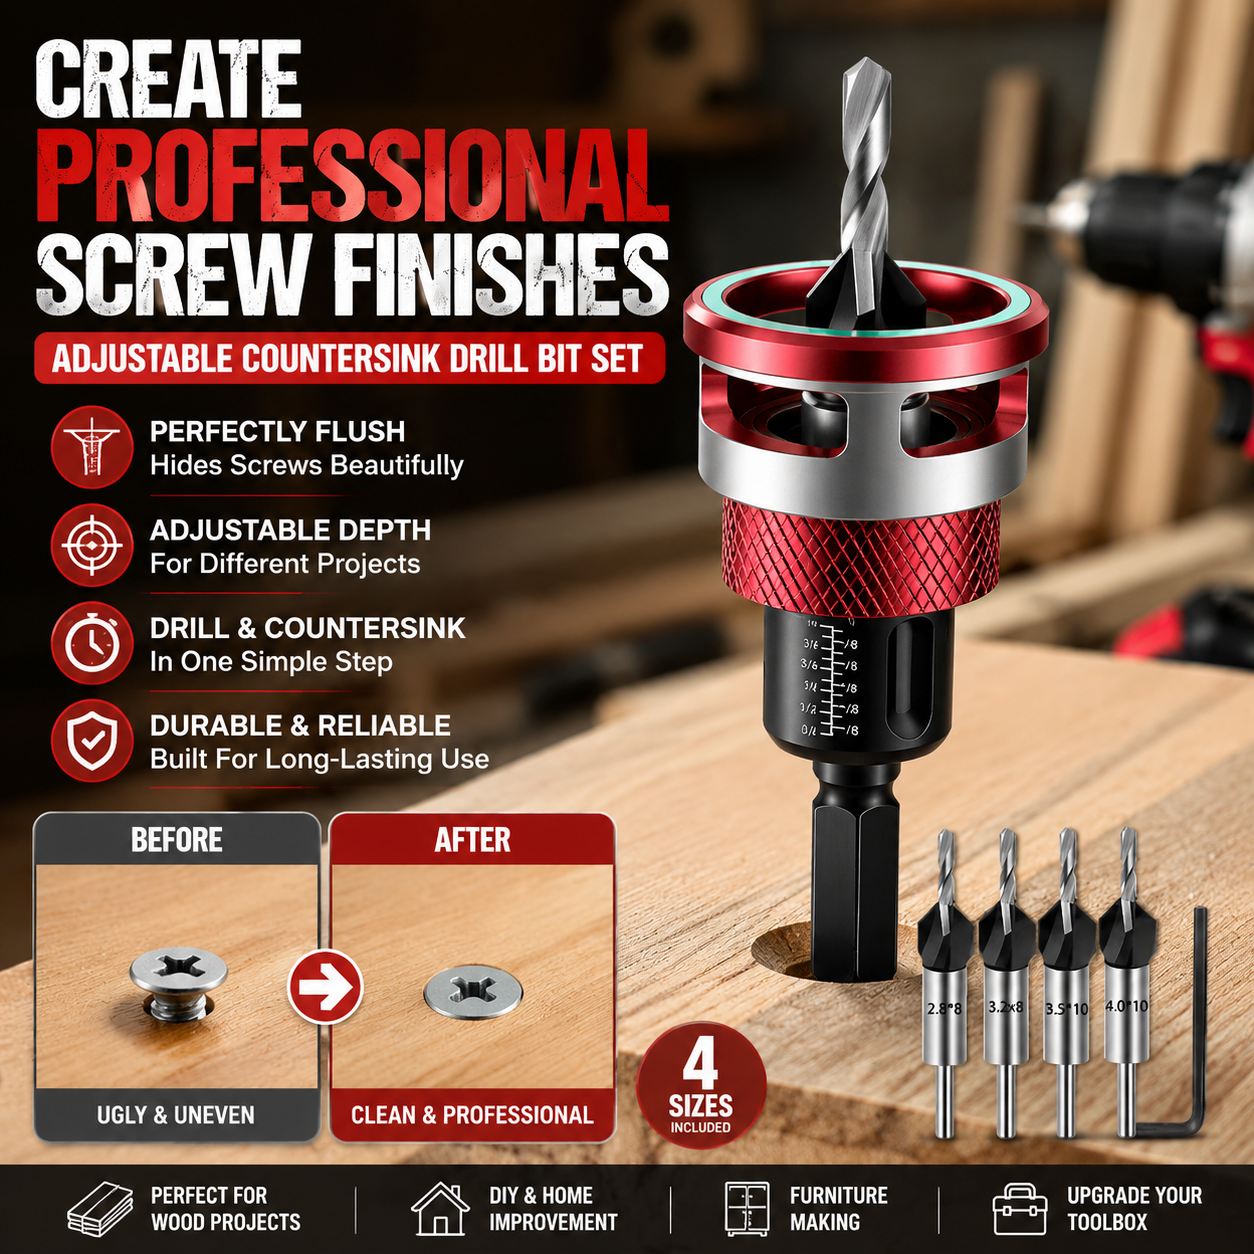
Adjustable Countersink Drill Bit Set
Cleaner Screw Seats in One Drilling Operation
Make Every Screw Sit Neat, Flush & Finished.
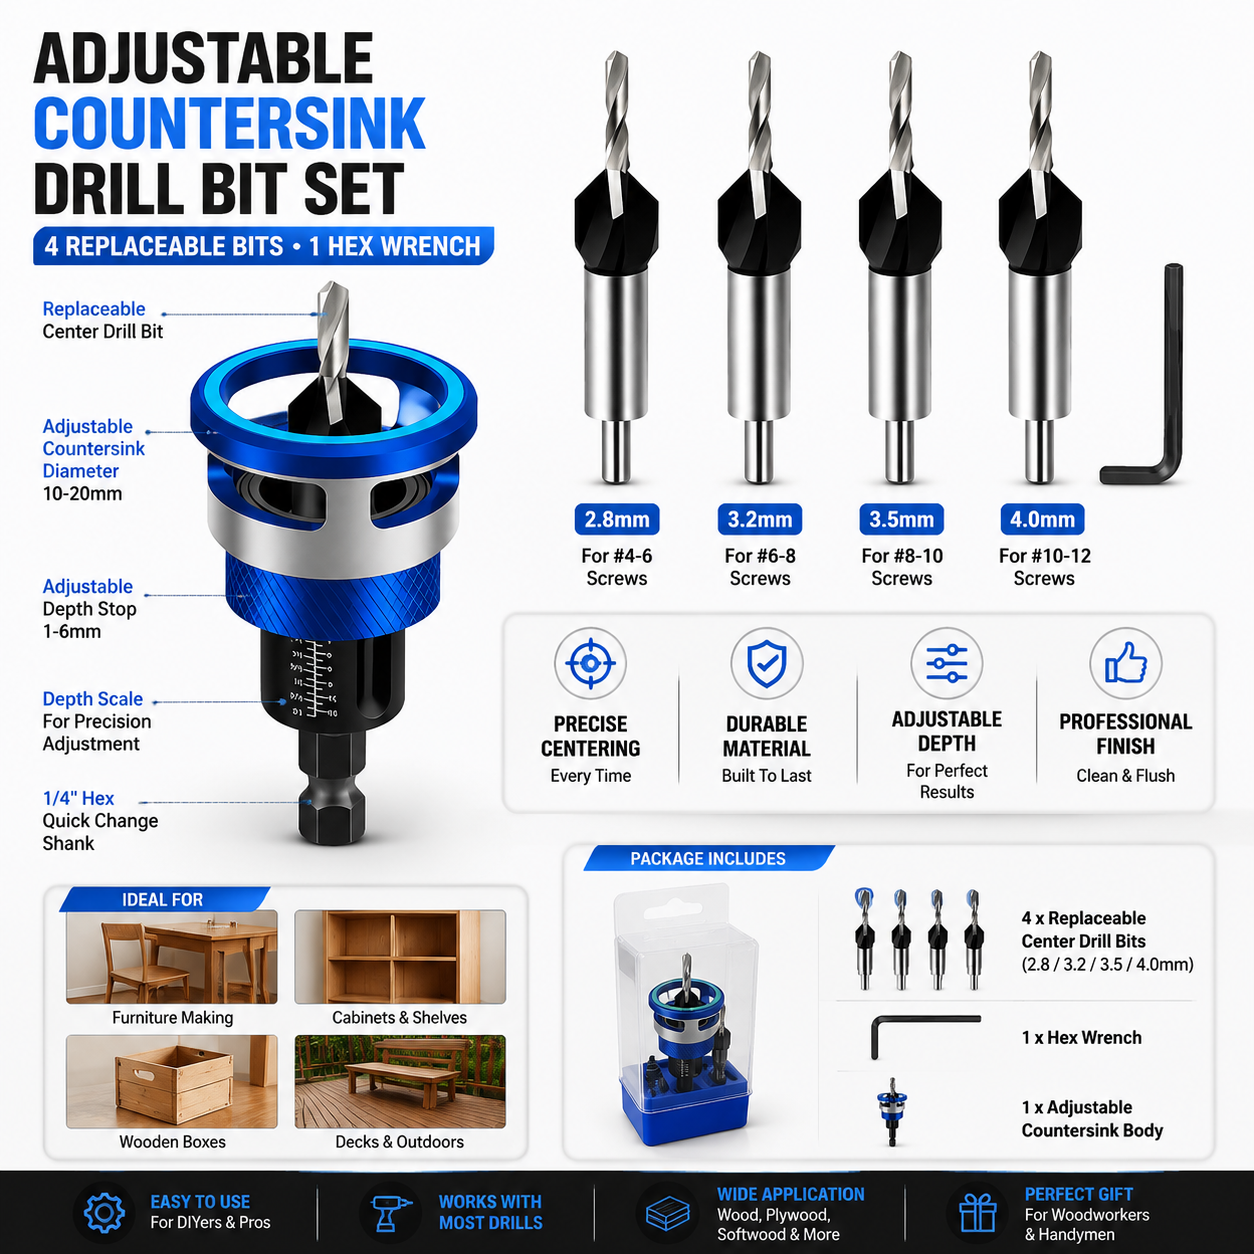
Drill a pilot hole and shape the countersink at the same time, helping furniture, cabinets, shelves and weekend woodworking projects look cleaner with fewer bit changes.
- Combines pilot drilling and countersinking in one setup
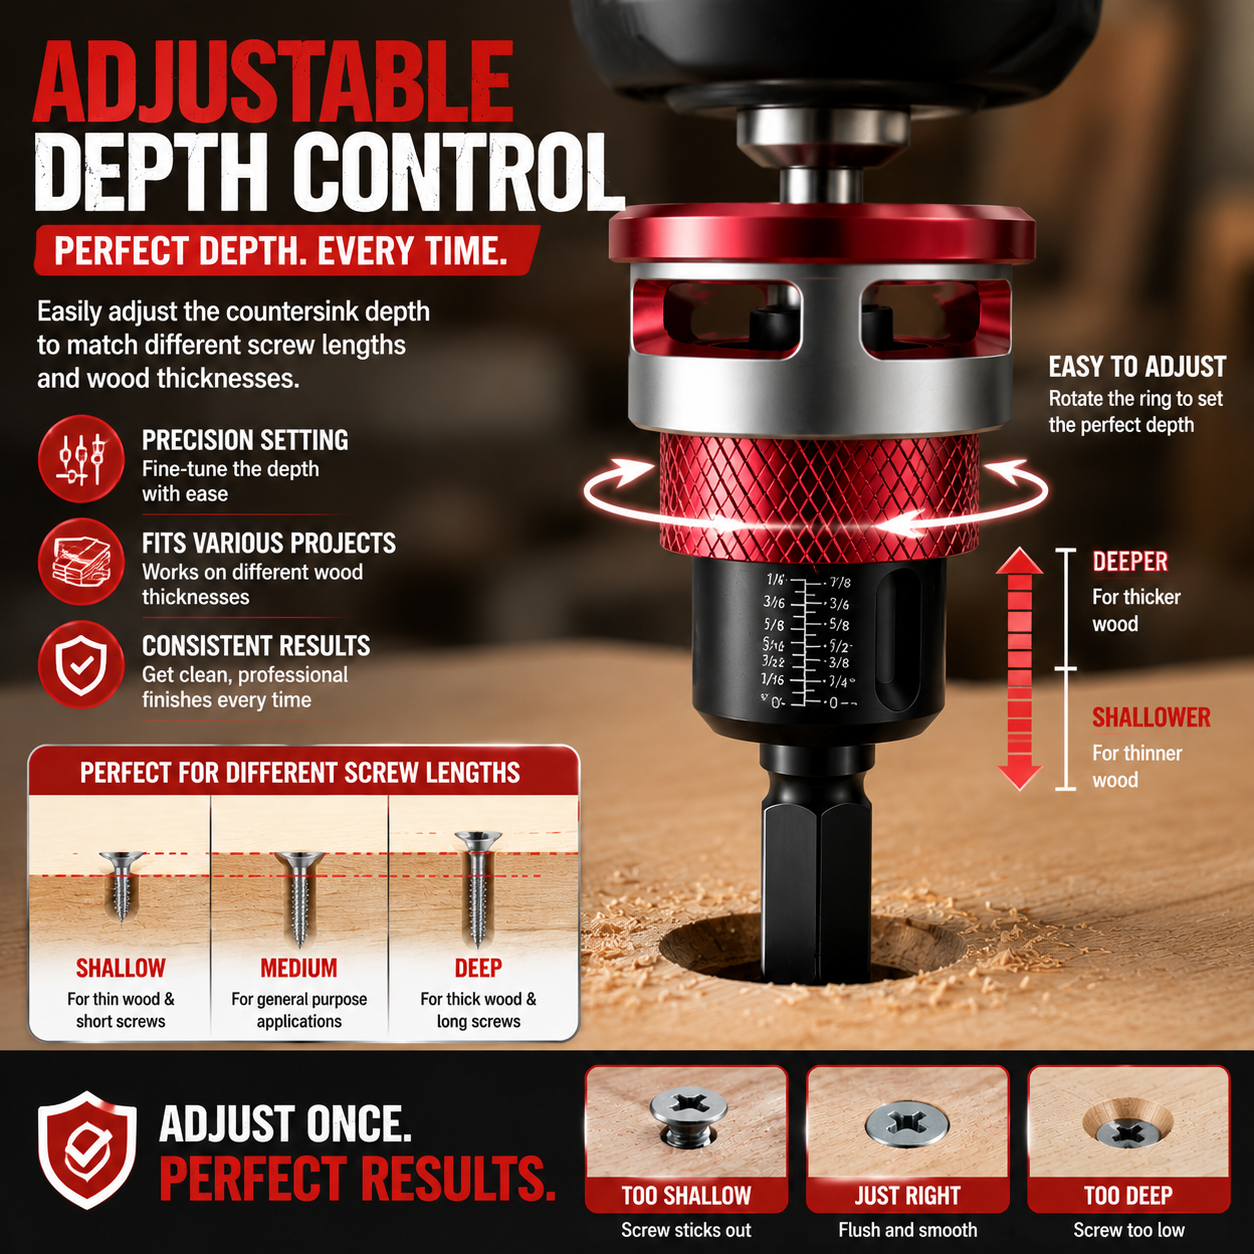
- Adjustable collar helps control countersink depth
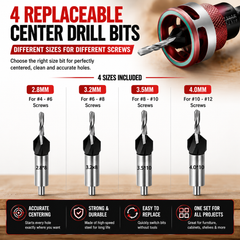
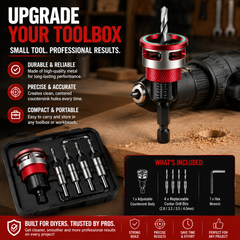
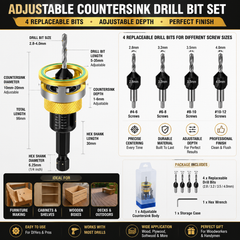
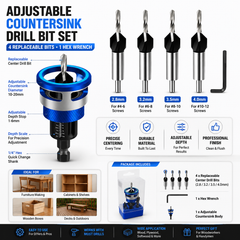
- Four replaceable center bits: 2.8, 3.2, 3.5 and 4.0mm
- Creates a recessed seat for compatible screw heads
- Includes a hex wrench for adjustment and bit changes

2 Steps in 1Pilot hole and countersink
Adjustable DepthFine-tune the screw recess
4 Bit Sizes2.8 / 3.2 / 3.5 / 4.0mm
DIY FriendlyFurniture, shelves and cabinets
Small Hardware Should Not Spoil the Whole Project
You Built It Carefully.
The Screw Heads Should Look That Way Too.
A raised or uneven screw head can catch on the surface and make otherwise clean joinery look unfinished. Creating the pilot hole and countersink together helps establish a more consistent seat before the screw is installed.
Without a Countersink
Screw heads may remain proud of the surface, edges may look rough and a separate bit change can add another step.
With a Prepared Screw Seat
The compatible screw head can sit more neatly in the recess for a smoother-looking woodworking finish.
Drill the Pilot Hole.
Shape the Screw Seat at the Same Time.
Shape the Screw Seat at the Same Time.
How It Works
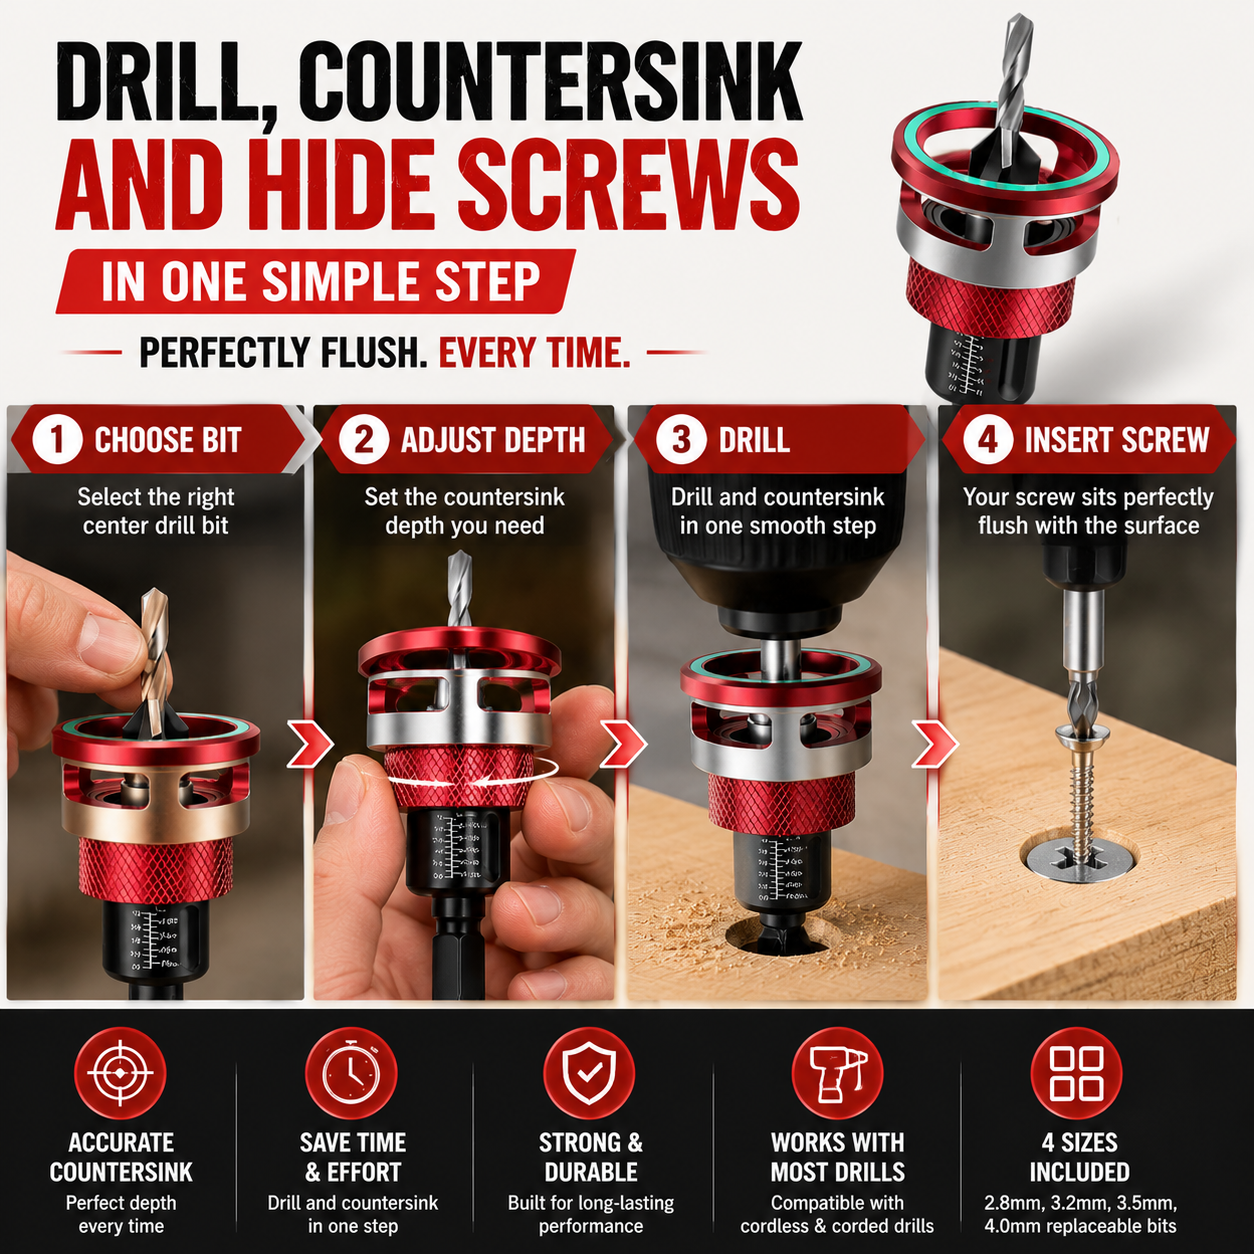
Four Steps to a Cleaner Installation
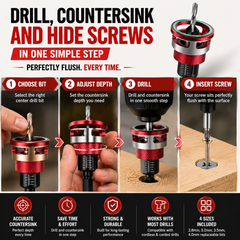
Set the tool up for your screw and material first. A test hole in scrap wood helps confirm the correct bit size and depth before working on the final piece.

Step 1
Choose the Bit
Select a center drill diameter suited to the screw and the wood.
Step 2
Set the Depth
Use the hex wrench to position and secure the countersink collar.
Step 3
Test & Drill
Make a scrap-wood test, then drill straight with controlled speed.
Finish the installation: Drive the compatible screw into the prepared seat without over-tightening. Results depend on screw-head shape, wood density, drill speed and depth adjustment.
Designed Around Better Control
The Features That Make Repeat Work Easier
Combined Operation
Drill & Countersink Together
Create the pilot hole and screw-head recess without switching between two separate tools.
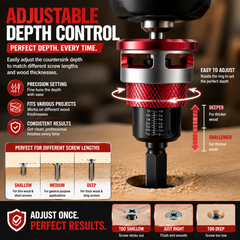
Depth Adjustment
Set the Recess You Need
Move the collar along the center bit and lock it with the supplied hex wrench.
Four Diameters
Match More Screw Sizes
Choose from 2.8mm, 3.2mm, 3.5mm and 4.0mm center drill bits.

01
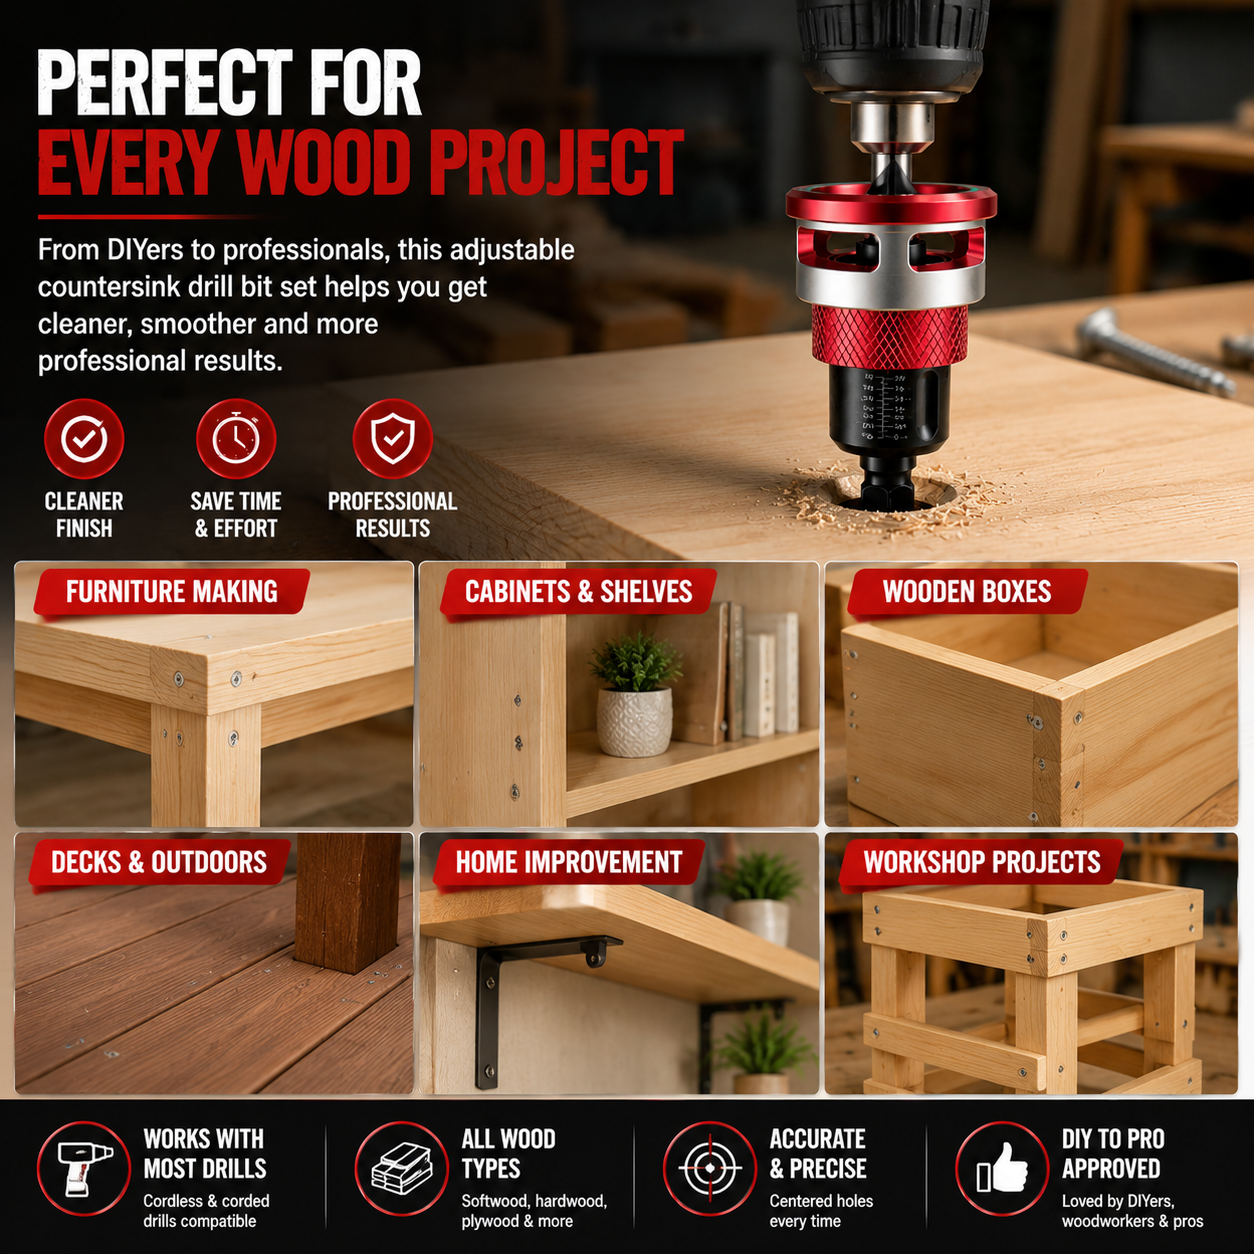
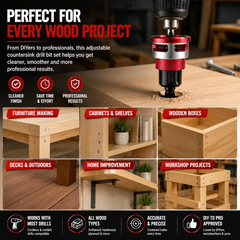
From the Workshop to Weekend Projects
A Cleaner Finish Across Everyday Woodworking.
Use the set when preparing compatible screw holes in furniture parts, cabinets, shelves, wooden boxes and home-improvement projects. Always test the selected bit on scrap material first—especially with dense, brittle or finished wood.
Furniture Making
Cabinet Work
Wall Shelves
Wooden Boxes
Home Repairs
Workshop Projects
Choose Carefully
Match the Pilot Bit to the Screw
The correct size should leave enough wood for the screw threads to grip while reducing splitting risk.
Adjust Gradually
Start Shallow, Then Fine-Tune
A shallow first setting is easier to correct than a recess drilled too deep.
Work Straight
Keep the Drill Aligned
Stable, perpendicular drilling helps create a more even countersink and pilot hole.
Better Results Begin Before Drilling
Three Habits for a More Consistent Finish
Wood species, screw geometry and drill settings all influence the result. A careful setup protects the workpiece and makes repeat holes easier to reproduce.
Product Information
What Comes in the Set
Product TypeAdjustable woodworking countersink drill bit set
Center Bit Sizes2.8mm / 3.2mm / 3.5mm / 4.0mm
Included1 × adjustable countersink body, 4 × replaceable center drill bits, 1 × hex wrench
Recommended UsePilot drilling and countersinking in suitable wood materials
Drill CompatibilityUse only with a drill chuck that securely accepts the tool’s shank size
Before use: Confirm that the shank is fully secured in the chuck and the collar/set screw is tightened. Remove the drill battery or unplug the drill before installing, adjusting or replacing a bit.
Safety: Wear eye protection, clamp the workpiece, keep hands away from the rotating tool and do not exceed the drill bit or material’s suitable speed. Stop immediately if the bit bends, slips or becomes damaged.
Before You Start the Next Project
Frequently Asked Questions
Does it drill the pilot hole and countersink together?
Yes. The center bit forms the pilot hole while the surrounding cutter creates the countersink recess in the same drilling operation.
Can the countersink depth be adjusted?
Yes. Loosen the set screw with the hex wrench, position the collar at the desired depth and tighten it securely. Test the setting on scrap wood first.
Which center bit size should I use?
Choose according to the screw’s core diameter and the material. The goal is to leave sufficient wood for thread engagement. If uncertain, start with a smaller pilot hole and test on scrap.
Will it fit my cordless drill?
It may work with many standard electric or cordless drill chucks, but compatibility depends on the actual shank and chuck capacity. Confirm the measurements before use.
Can it be used on hardwood?
Suitability depends on the wood species, bit condition and drill settings. Dense woods may require a slower, controlled approach. Always test first and avoid forcing the cutter.
How do I reduce tear-out or burning?
Use a sharp, correctly aligned bit, clamp the workpiece, apply steady pressure and avoid excessive speed. Clear chips between holes and test the setup before drilling the final piece.
Give Every Screw a Better Seat
Fewer Bit Changes.
Cleaner-Looking Woodworking.
Choose the center bit, set the depth and prepare neater recessed screw holes for your next project.
4 center-bit sizes • Adjustable depth • Hex wrench included
-
Enjoy free shipping on orders over $50. Orders are processed within 1–3 business days and typically arrive within 7–15 business days.
-
We work with trusted international shipping partners to deliver orders worldwide.
-
Tracking information will be sent by email once your order ships, and you'll receive updates at key stages of transit until your package arrives.
Shop with confidence! We offer a 30-day return and exchange policy from the date you receive your order.
If you're not completely satisfied with your purchase, please contact our customer support team for assistance.
For return or exchange requests, please email us at support@householdchoose.com.
Adjustable Countersink Drill Bit Set
Cleaner Screw Seats in One Drilling Operation
Make Every Screw Sit Neat, Flush & Finished.
Drill a pilot hole and shape the countersink at the same time, helping furniture, cabinets, shelves and weekend woodworking projects look cleaner with fewer bit changes.
- Combines pilot drilling and countersinking in one setup
- Adjustable collar helps control countersink depth
- Four replaceable center bits: 2.8, 3.2, 3.5 and 4.0mm
- Creates a recessed seat for compatible screw heads
- Includes a hex wrench for adjustment and bit changes
2 Steps in 1Pilot hole and countersink
Adjustable DepthFine-tune the screw recess
4 Bit Sizes2.8 / 3.2 / 3.5 / 4.0mm
DIY FriendlyFurniture, shelves and cabinets
Small Hardware Should Not Spoil the Whole Project
You Built It Carefully.
The Screw Heads Should Look That Way Too.
A raised or uneven screw head can catch on the surface and make otherwise clean joinery look unfinished. Creating the pilot hole and countersink together helps establish a more consistent seat before the screw is installed.
Without a Countersink
Screw heads may remain proud of the surface, edges may look rough and a separate bit change can add another step.
With a Prepared Screw Seat
The compatible screw head can sit more neatly in the recess for a smoother-looking woodworking finish.
Drill the Pilot Hole.
Shape the Screw Seat at the Same Time.
Shape the Screw Seat at the Same Time.
How It Works
Four Steps to a Cleaner Installation
Set the tool up for your screw and material first. A test hole in scrap wood helps confirm the correct bit size and depth before working on the final piece.
Step 1
Choose the Bit
Select a center drill diameter suited to the screw and the wood.
Step 2
Set the Depth
Use the hex wrench to position and secure the countersink collar.
Step 3
Test & Drill
Make a scrap-wood test, then drill straight with controlled speed.
Finish the installation: Drive the compatible screw into the prepared seat without over-tightening. Results depend on screw-head shape, wood density, drill speed and depth adjustment.
Designed Around Better Control
The Features That Make Repeat Work Easier
Combined Operation
Drill & Countersink Together
Create the pilot hole and screw-head recess without switching between two separate tools.
Depth Adjustment
Set the Recess You Need
Move the collar along the center bit and lock it with the supplied hex wrench.
Four Diameters
Match More Screw Sizes
Choose from 2.8mm, 3.2mm, 3.5mm and 4.0mm center drill bits.
01
From the Workshop to Weekend Projects
A Cleaner Finish Across Everyday Woodworking.
Use the set when preparing compatible screw holes in furniture parts, cabinets, shelves, wooden boxes and home-improvement projects. Always test the selected bit on scrap material first—especially with dense, brittle or finished wood.
Furniture Making
Cabinet Work
Wall Shelves
Wooden Boxes
Home Repairs
Workshop Projects
Choose Carefully
Match the Pilot Bit to the Screw
The correct size should leave enough wood for the screw threads to grip while reducing splitting risk.
Adjust Gradually
Start Shallow, Then Fine-Tune
A shallow first setting is easier to correct than a recess drilled too deep.
Work Straight
Keep the Drill Aligned
Stable, perpendicular drilling helps create a more even countersink and pilot hole.
Better Results Begin Before Drilling
Three Habits for a More Consistent Finish
Wood species, screw geometry and drill settings all influence the result. A careful setup protects the workpiece and makes repeat holes easier to reproduce.
Product Information
What Comes in the Set
Product TypeAdjustable woodworking countersink drill bit set
Center Bit Sizes2.8mm / 3.2mm / 3.5mm / 4.0mm
Included1 × adjustable countersink body, 4 × replaceable center drill bits, 1 × hex wrench
Recommended UsePilot drilling and countersinking in suitable wood materials
Drill CompatibilityUse only with a drill chuck that securely accepts the tool’s shank size
Before use: Confirm that the shank is fully secured in the chuck and the collar/set screw is tightened. Remove the drill battery or unplug the drill before installing, adjusting or replacing a bit.
Safety: Wear eye protection, clamp the workpiece, keep hands away from the rotating tool and do not exceed the drill bit or material’s suitable speed. Stop immediately if the bit bends, slips or becomes damaged.
Before You Start the Next Project
Frequently Asked Questions
Does it drill the pilot hole and countersink together?
Yes. The center bit forms the pilot hole while the surrounding cutter creates the countersink recess in the same drilling operation.
Can the countersink depth be adjusted?
Yes. Loosen the set screw with the hex wrench, position the collar at the desired depth and tighten it securely. Test the setting on scrap wood first.
Which center bit size should I use?
Choose according to the screw’s core diameter and the material. The goal is to leave sufficient wood for thread engagement. If uncertain, start with a smaller pilot hole and test on scrap.
Will it fit my cordless drill?
It may work with many standard electric or cordless drill chucks, but compatibility depends on the actual shank and chuck capacity. Confirm the measurements before use.
Can it be used on hardwood?
Suitability depends on the wood species, bit condition and drill settings. Dense woods may require a slower, controlled approach. Always test first and avoid forcing the cutter.
How do I reduce tear-out or burning?
Use a sharp, correctly aligned bit, clamp the workpiece, apply steady pressure and avoid excessive speed. Clear chips between holes and test the setup before drilling the final piece.
Give Every Screw a Better Seat
Fewer Bit Changes.
Cleaner-Looking Woodworking.
Choose the center bit, set the depth and prepare neater recessed screw holes for your next project.
4 center-bit sizes • Adjustable depth • Hex wrench included
Why We're The Best...

Free Shipping Over $50

Safe & Secure Checkout

Hassle-Free Returns

100% Money-Back
There's More To See
Example product title
- $ 703.00 MXN
$ 1,386.00 MXN- $ 703.00 MXN
- Unit price
- per
Example product title
- $ 703.00 MXN
$ 1,386.00 MXN- $ 703.00 MXN
- Unit price
- per
Example product title
- $ 703.00 MXN
$ 1,386.00 MXN- $ 703.00 MXN
- Unit price
- per
Example product title
- $ 703.00 MXN
$ 1,386.00 MXN- $ 703.00 MXN
- Unit price
- per
Example product title
- $ 703.00 MXN
$ 1,386.00 MXN- $ 703.00 MXN
- Unit price
- per
Example product title
- $ 703.00 MXN
$ 1,386.00 MXN- $ 703.00 MXN
- Unit price
- per
Example product title
- $ 703.00 MXN
$ 1,386.00 MXN- $ 703.00 MXN
- Unit price
- per
Example product title
- $ 703.00 MXN
$ 1,386.00 MXN- $ 703.00 MXN
- Unit price
- per
Example product title
- $ 703.00 MXN
$ 1,386.00 MXN- $ 703.00 MXN
- Unit price
- per
Example product title
- $ 703.00 MXN
$ 1,386.00 MXN- $ 703.00 MXN
- Unit price
- per
Recently Viewed Products
Example product title
- $ 703.00 MXN
$ 1,386.00 MXN- $ 703.00 MXN
- Unit price
- per
Example product title
- $ 703.00 MXN
$ 1,386.00 MXN- $ 703.00 MXN
- Unit price
- per
Example product title
- $ 703.00 MXN
$ 1,386.00 MXN- $ 703.00 MXN
- Unit price
- per
Example product title
- $ 703.00 MXN
$ 1,386.00 MXN- $ 703.00 MXN
- Unit price
- per
Example product title
- $ 703.00 MXN
$ 1,386.00 MXN- $ 703.00 MXN
- Unit price
- per
Example product title
- $ 703.00 MXN
$ 1,386.00 MXN- $ 703.00 MXN
- Unit price
- per
Example product title
- $ 703.00 MXN
$ 1,386.00 MXN- $ 703.00 MXN
- Unit price
- per
Example product title
- $ 703.00 MXN
$ 1,386.00 MXN- $ 703.00 MXN
- Unit price
- per
Example product title
- $ 703.00 MXN
$ 1,386.00 MXN- $ 703.00 MXN
- Unit price
- per
Example product title
- $ 703.00 MXN
$ 1,386.00 MXN- $ 703.00 MXN
- Unit price
- per

- Choosing a selection results in a full page refresh.